> ## Documentation Index
> Fetch the complete documentation index at: https://docs.bringin.app/llms.txt
> Use this file to discover all available pages before exploring further.
# API Keys
> Onboard users and get per-user api-keys
Every API call to Bringin requires an `api-key` header. There are two types:
| Key | Purpose | How you get it |
| ---------------- | ------------------------------------------------ | ---------------------------------------- |
| **Master key** | Onboard users, get signup links, check rates | Provided by Bringin during partner setup |
| **Per-user key** | Create orders, check balance, manage connections | Returned after connecting a user |
Per-user keys have **limited permissions** — they can only push crypto for conversion. They cannot withdraw funds or access sensitive data. Safe to store on client devices (mobile, web) or use from your backend.
***
## Getting Per-User API Keys
This is the first step of any integration. Before you can create orders or connections for a user, you need their per-user api-key.
### Option 1: Via API
Call `POST /application/connect` with the user's email. Bringin handles the rest based on whether the user exists.
```bash theme={null}
POST /api/v0/application/connect
```
```json Request theme={null}
{
"email": "user@example.com",
"callback": "https://yourapp.com/bringin-webhooks",
"ref": "your-internal-user-id"
}
```
**`callback`** is the URL where Bringin sends webhooks with the api-key. If you provide a callback, [HMAC signing](/authentication/hmac-signing) is required on this request.
**`ref`** is your internal user ID. It's returned in all webhooks so you can match them to your users.
Three things can happen depending on the user's status:
If the user already has an active connection to your application, the api-key is returned **immediately** in the response. No webhooks, no waiting.
```json Response theme={null}
{
"status": "connected",
"userRegistered": true,
"isUserConnected": true,
"apiKey": "NzY1YWQzZGYwNTE4NDQ4NzkxMTcxMTIxYzVmY2NlMDI="
}
```
Store the `apiKey` and start making API calls.
This commonly happens when a user enters their email a second time — for example, they signed up for Bringin, then come back to your app and enter the same email. You get the key right away.
The user has a Bringin account but hasn't connected to your application yet. Bringin sends them an email requesting consent.
```json Response theme={null}
{
"status": "pending",
"userRegistered": true,
"isUserConnected": false
}
```
**What to show the user:** Prompt them to check their email and click the "Confirm connection" link.
**How you get the key:** Once the user confirms, Bringin sends the api-key to your callback URL via the [`/verification-status` webhook](/webhooks#verification-status). Or you can [poll for status](#polling-for-status).
The user doesn't have a Bringin account. Bringin sends them an onboarding email and returns a signup URL.
```json Response theme={null}
{
"status": "onboarding",
"userRegistered": false,
"isUserConnected": false,
"signupURL": "https://app.bringin.xyz/signup?inviteId=..."
}
```
**What to show the user:** Display the `signupURL` in your app (button or link) to guide them through Bringin onboarding. The user completes signup + KYC on Bringin.
**How you get the key:** Once KYC is approved, Bringin sends the api-key to your callback URL via the [`/verification-status` webhook](/webhooks#verification-status). Or you can [poll for status](#polling-for-status).
### Receiving the key via webhook
If you provided a `callback` URL, Bringin sends a POST request to `{callback}/verification-status` when the user is ready:
```json theme={null}
{
"userId": "f5cbb00c-d36b-4b0d-b8ef-f412757603df",
"apikey": "MDU4MTJlNjdkYWU1NGJiZGE0ZjAxNzQ4YzM0NWJlYmE=",
"verificationStatus": "APPROVED",
"ref": "your-internal-user-id"
}
```
Store the `apikey` — this is the per-user key for all subsequent API calls for this user.
Respond with `200` quickly. You may receive duplicate webhooks — use `ref` or `userId` as an idempotency key.
### Polling for status
If you don't use webhooks, poll `GET /application/connect/status` with the user's email:
```bash theme={null}
GET /api/v0/application/connect/status?email=user@example.com
```
| `status` | Meaning | What to do |
| ------------ | ------------------------------------ | -------------------------------- |
| `onboarding` | Signup or KYC in progress | Keep polling every 15-30 seconds |
| `pending` | Consent email sent, waiting for user | Keep polling |
| `connected` | Ready — `apiKey` in response | Store it, stop polling |
| `rejected` | KYC was rejected | Show error to user |
```json Connected response theme={null}
{
"status": "connected",
"apiKey": "ZTY3YzNhMzQ3Yzk4NGJjMmEwZWU1NTQ4NmE5MjJjZTk="
}
```
Polling uses your **master key** only. No HMAC signing required.
### Option 2: From the Bringin dashboard
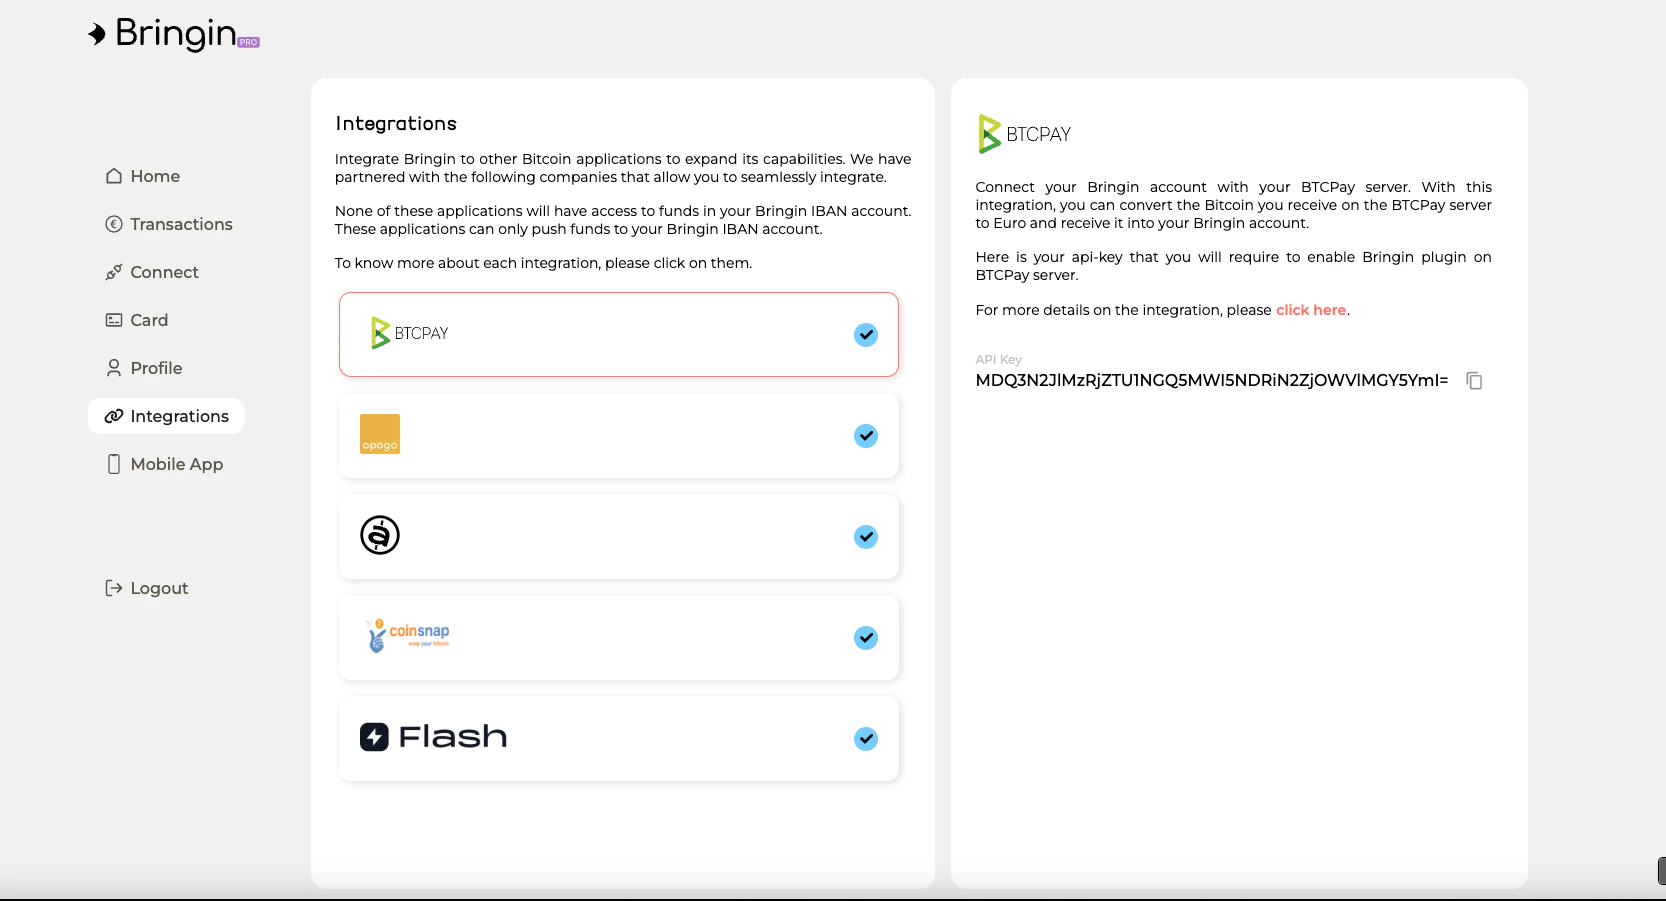
Users can find their api-key on the **Integrations** tab in the Bringin dashboard or mobile app. Click on the partner integration to reveal the API key.
 | Environment | Dashboard |
| ----------- | -------------------------------------------------- |
| Sandbox | [dev-app.bringin.xyz](https://dev-app.bringin.xyz) |
| Production | [app.bringin.xyz](https://app.bringin.xyz) |
This is useful during development but not recommended for production flows.
***
## Onboarding + Connection in One Call
You can combine user onboarding and connection creation into a single API call by passing `direction` and the relevant address or bank details:
```json Request theme={null}
{
"email": "user@example.com",
"callback": "https://yourapp.com/bringin-webhooks",
"ref": "your-internal-user-id",
"direction": "FIAT_TO_CRYPTO",
"btcAddress": "bc1qxy2kgdygjrsqtzq2n0yrf2493p83kkfjhx0wlh",
"currency": "BTC",
"network": "BTC"
}
```
```json Request theme={null}
{
"email": "user@example.com",
"callback": "https://yourapp.com/bringin-webhooks",
"ref": "your-internal-user-id",
"direction": "CRYPTO_TO_FIAT",
"iban": "DE89370400440532013000",
"bic": "COBADEFFXXX",
"beneficiaryName": "Alice Smith",
"currency": "BTC",
"network": "BTC"
}
```
Bringin handles onboarding and connection creation. You receive two webhooks:
1. [`/verification-status`](/webhooks#verification-status) — with the per-user api-key
2. [`/connection-status`](/webhooks#connection-status) — with the deposit IBAN or address
See the [Connections guide](/guides/connection-integration) for details on connection types.
***
## Complete Flow Diagram
```mermaid theme={null}
flowchart TD
A[Your app calls POST /application/connect] --> B{User status?}
B -->|Already connected| C[api-key returned immediately]
B -->|Existing user, not connected| D[Consent email sent to user]
B -->|New user| E[Signup email sent + signupURL returned]
D -->|User clicks confirm| F[Webhook: /verification-status with api-key]
E -->|User completes signup + KYC| F
F --> G[Store api-key, start using APIs]
C --> G
```
***
## Managing API Keys
* **One key per user per application.** Each user connected to your app gets a unique per-user key.
* **Keys don't expire.** Once issued, a per-user key remains valid unless revoked.
* **Lost keys?** Call `POST /application/connect` again with the same email — if the user is already connected, the api-key is returned immediately.
* **Master key rotation** — Contact [support@bringin.xyz](mailto:support@bringin.xyz) if you need to rotate your master key or secret.
| Environment | Dashboard |
| ----------- | -------------------------------------------------- |
| Sandbox | [dev-app.bringin.xyz](https://dev-app.bringin.xyz) |
| Production | [app.bringin.xyz](https://app.bringin.xyz) |
This is useful during development but not recommended for production flows.
***
## Onboarding + Connection in One Call
You can combine user onboarding and connection creation into a single API call by passing `direction` and the relevant address or bank details:
```json Request theme={null}
{
"email": "user@example.com",
"callback": "https://yourapp.com/bringin-webhooks",
"ref": "your-internal-user-id",
"direction": "FIAT_TO_CRYPTO",
"btcAddress": "bc1qxy2kgdygjrsqtzq2n0yrf2493p83kkfjhx0wlh",
"currency": "BTC",
"network": "BTC"
}
```
```json Request theme={null}
{
"email": "user@example.com",
"callback": "https://yourapp.com/bringin-webhooks",
"ref": "your-internal-user-id",
"direction": "CRYPTO_TO_FIAT",
"iban": "DE89370400440532013000",
"bic": "COBADEFFXXX",
"beneficiaryName": "Alice Smith",
"currency": "BTC",
"network": "BTC"
}
```
Bringin handles onboarding and connection creation. You receive two webhooks:
1. [`/verification-status`](/webhooks#verification-status) — with the per-user api-key
2. [`/connection-status`](/webhooks#connection-status) — with the deposit IBAN or address
See the [Connections guide](/guides/connection-integration) for details on connection types.
***
## Complete Flow Diagram
```mermaid theme={null}
flowchart TD
A[Your app calls POST /application/connect] --> B{User status?}
B -->|Already connected| C[api-key returned immediately]
B -->|Existing user, not connected| D[Consent email sent to user]
B -->|New user| E[Signup email sent + signupURL returned]
D -->|User clicks confirm| F[Webhook: /verification-status with api-key]
E -->|User completes signup + KYC| F
F --> G[Store api-key, start using APIs]
C --> G
```
***
## Managing API Keys
* **One key per user per application.** Each user connected to your app gets a unique per-user key.
* **Keys don't expire.** Once issued, a per-user key remains valid unless revoked.
* **Lost keys?** Call `POST /application/connect` again with the same email — if the user is already connected, the api-key is returned immediately.
* **Master key rotation** — Contact [support@bringin.xyz](mailto:support@bringin.xyz) if you need to rotate your master key or secret.